

Hey guys! Today I thought we could have a look at something really cool that I’ve recently discovered. We’re all constantly looking at ways to improve our blogs – whether that’s by doing more discussion posts, getting on top of our reviews or beefing up our graphics. If it’s the latter, then you my friend are in luck. Today we’re going to work out how to make a logo for your blog in an easy and stress-free manner!
Graphics are pretty important for your blog, I’d say. But more importantly than that, they’re a lot of fun to make. I recently have made a proper logo for Upside-Down Books and whilst I’m 100% pleased with the final result, it took an awful lot of time. However! I was recently contacted by Candy who’s from a company called DesignEvo. I was asked if I could check out the website and review it here on my blog, and I said absolutely!

DesignEvo is an online website with a really user-friendly interface and site navigation and its purpose is to provide you with tweakable features to create a logo! The website is free and really easy to use. So if you’re looking at making a logo then I highly recommend checking this one out.
Users of Canva and other online editing & graphic design websites (such as Fotojet) will find DesignEvo super familiar in its set up.
The Set Up
DesignEvo will bring you first to a page where you can select different categories and browse templates set up for you. Some of the designs look familiar to me from companies I know, but don’t forget that you can alter the templates and make them your own.
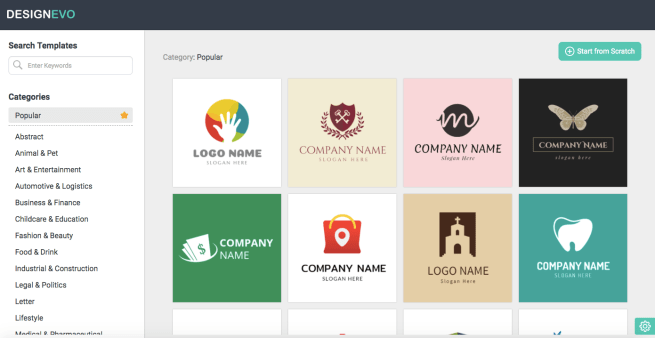
There are heaps of different designs so you can browse the popular designs as is shown in this image, or any of the variety of categories that you can see in the lefthand menu bar. In the top righthand corner you can see a blue button that says “Start from Scratch”; if you don’t want to use a template but need a helping hand to get started on your logo then you can use this option!
It’s very easy to navigate from here, my advice is to just click around and see what works for you!
How It Works
When you first go to the webpage and select either a template or the option to “Start from Scratch” a little tutorial pop up will appear (there are just three easy steps) and I’ll show you those down below. The first thing that will come up is showing you how to find icons to include in your logo. What does this mean? This means a simple search – like you might do on Canva – to find an image for your logo. If you use a template you might not need to do this, but if you want to add to the design or replace it, then this is where you’ll need to search!
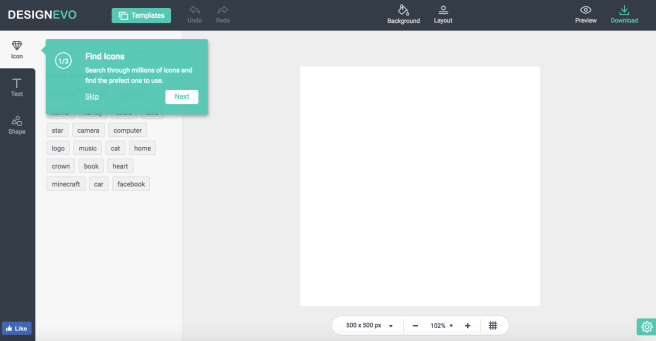
Once you’ve done that, you can add text. This is the next tab down and you’ll be able to select from many different fonts, change the size and even the colour. It’s all entirely up to you!

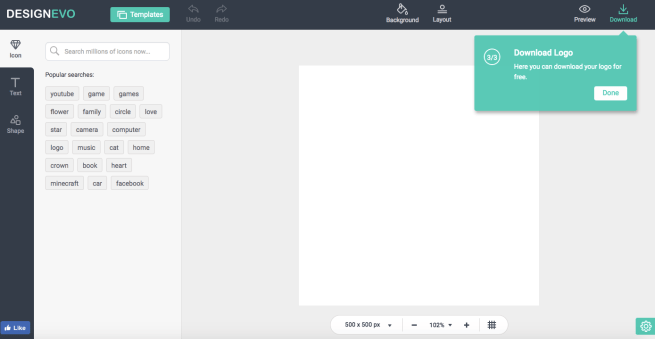
Once you’ve made your design using the Icon and Text tabs, if you’re ready, you can then download it. Easy peasy lemon squeazy! I have played around with this to create a design and I will say that when you do download it, it downloads as a Zip file. This freaked me out for a second but I just had to right click on the Zip file to select an option to expand it. Why does it do this? When you download your design from DesignEvo the Zip file contains all the different version you could want; a.k.a, you’ll get a .png, .jpg and others.
If we take a closer look at those tabs down the lefthand menu bar, you can see some of the different options you might get:


As you can see, I searched for “flower” in the Icon tab. You can see the immediate results that come up with that one there. When you open the Text tab, what you can see in the middle image are the options that come up; there are quite a few here so you can really personalise your typography! And finally, in the third tab, the Shape tab, you can use things such as badges or frame to maybe set around your text or icons/images.
For Example . . .
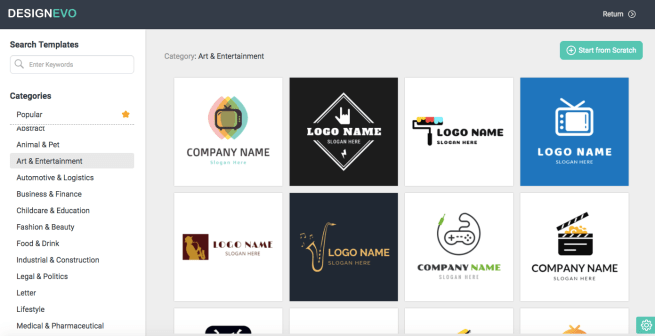
But it’s all well and good to talk about it – how about I show you what I managed to do? I started off by going back to the Template page. I then clicked on the categories “Arts and Entertainment” and scrolled through the options there.
Once I found a design I liked, I clicked on it and it brings up a little window asking you to put in some details. This is to automatically generate the logo before you go to town tweaking it. What do you need? Just your company (or blog) name and a tag line (if you want one). Then, you click “get started”.
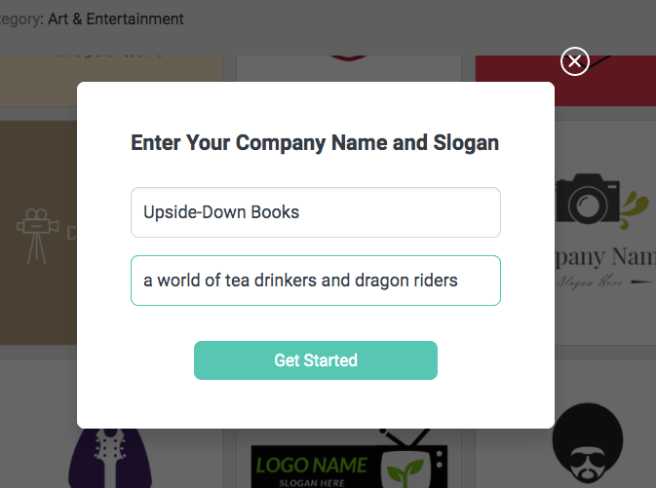
This will generate your text into a preset font size and style. Seeing as I have a long tagline, I had to adjust mine otherwise it doesn’t fit in the logo size. This is easy to do! However, this is what will happen when you click get started:
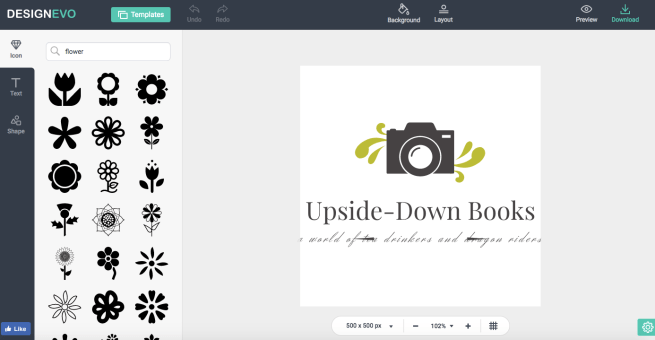
I liked this template, but I found the font of the tagline very hard to read when it’s so small. So after a quick fiddle around I came up with something more like this:
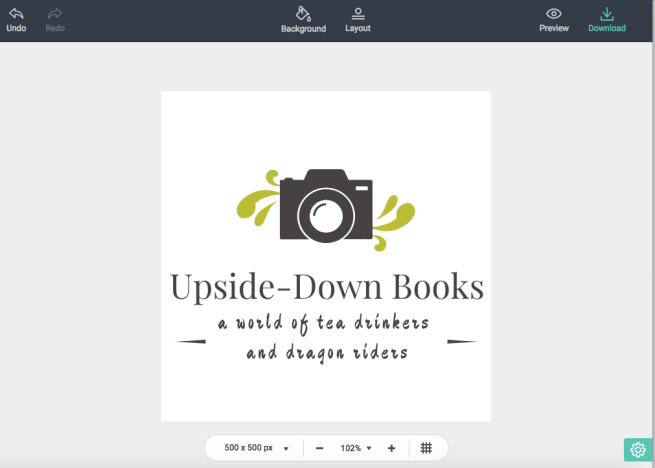
As you can see, you have a little menu bar at the bottom. You can change the actual size of your logo (although the dimensions given here are a standard logo size), you can zoom right in to check on those finer details, and that little hash symbol brings up dots all over the design so you can make sure everything is lined up and to scale. Handy, right!?
Now, say you didn’t like that colour scheme? No worries! The camera icon there and the two splashes either side are three individual images. You can click on all of them and this menu bar appears above your design:

Going from left to right, there’s a square of colour (black) which you select to change the colour; there a vertical flip, a horizontal flip, and right over to the other side is a layer tool (to bring something forwards/backwards), a copy button and a trash button. Easy! So, playing with these I change the design to this:
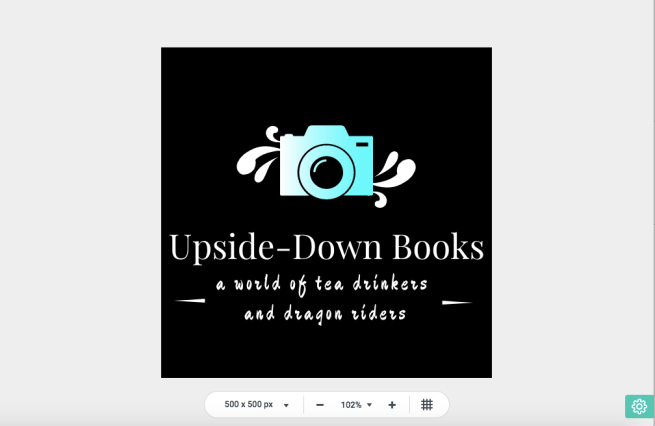
I put a gradient colour on the camera to show you that you can do this! Which I think is super cool. There is also another option to change the layout next to the background button. This is located just above the colour bar menu, although just out of shot here. It’s cool to play with to shift around where things sit in the logo.
All you have to do next, is hit save!
Languages
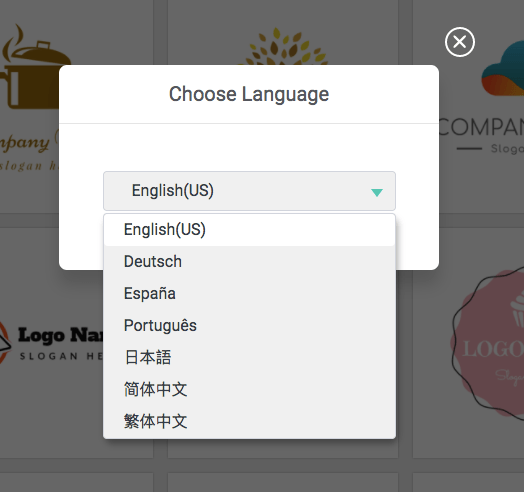
On one final note! DesignEvo comes in a few languages. Down the bottom righthand corner, you’ll see a cog – that’s the settings bar. If you click that there are a few options (such as feedback, etc). One of which is language. The follows languages are what the website comes in, if you are not an English speaker:
Pretty Nifty, Huh?
I really love this website. I hope some of you find this helpful for creating some more graphics for your blogs – or maybe your companies outside of the blogging world. As I said before, this website is completely free and I liked it so much that I wanted to a do an in-depth review for you! So you can add this to your list of handy websites to get your blog looking fantastic!
~~ Kirstie ~~
![]()
Discover more from Upside-Down Books
Subscribe to get the latest posts sent to your email.

This is awesome! I just signed up and am excited to use it.
LikeLiked by 1 person
Yay I’m glad to hear it!
LikeLike
It very good! Thanks
LikeLiked by 1 person
This was such an interesting helpful post! Thanks for sharing 🙂
LikeLiked by 1 person
You’re welcome!!
LikeLike
Loving the logo! This was actually such a fab tutorial – my usual site for making my lil’ graphics has just become unavailable, so will definitely be looking into this.
Going to go have a nosey round your blog for everything I’ve missed out on aha!
LikeLiked by 1 person
Hey hey! You’re back! Thanks 🙃 glad you found it useful!!
LikeLiked by 1 person
I like to keep everyone on their toes with my constant random popping up at the strangest of times. A bit of a christmas miracle this time!
LikeLiked by 1 person
Thanks Ellen
LikeLike